

How To Change Read Only Folder In Windows 10
Folder Keeps Reverting to Read-Just? Notice Out How to Fix That
Windows has a read-only choice that a user can set or is set automatically by the system to protect file integrity. Many users accept complained that they can't remove the read-only attribute because the files and folders revert to read-only. Fortunately, you can fix information technology using the methods we have provided below.
Why Files Continue Reverting to Read-Just?
The first reason your files/binder may revert to read-only is if you upgraded to Windows 10 from Windows 8.1 or Windows 7. During the upgrade, your business relationship permissions may take been altered, which prevents y'all from disabling the read-just attribute. Yous may also experience the read-just bug after updating Windows x.
The second reason is account permissions alone. If your account permissions were somehow changed, unchecking the read-only attribute will cause it to revert back to read-only. If that'south the case, you take to alter your business relationship's permissions to those that grant y'all administrator privileges.
The third reason may accept something to exercise with your tertiary-party antivirus software. If a third-party antivirus program detects a file equally a threat, it may set the read-only attribute. A third-party antivirus program may likewise gear up the read-only attribute for your folders and files without reason. If that'south the case, so you should try to disable the antivirus software and endeavor removing the read-only attribute.
Video Guide on How to Set Folders Reverting to Read-Only on Windows x
Tabular array of Contents:
- Introduction
- Method 1. Run DISM (Deployment Paradigm Servicing and Management) and SFC (Organisation File Checker) Scans
- Method 2. Disable Controlled Folder Access
- Method 3. Modify the Attribute of the Folder
- Method 4. Change the Permissions of the Drive
- Video Guide on How to Fix Folders Reverting to Read-Only on Windows 10
Method one. Run DISM (Deployment Image Servicing and Management) and SFC (Organisation File Checker) scans
Past far, the easiest set up for the read-merely bug is to run DISM and System File Checker commands in the Command Prompt. These commands will cheque your computer for corrupted files and volition attempt to repair them.
ane. Simultaneously agree down Windows+R keys to open Run.
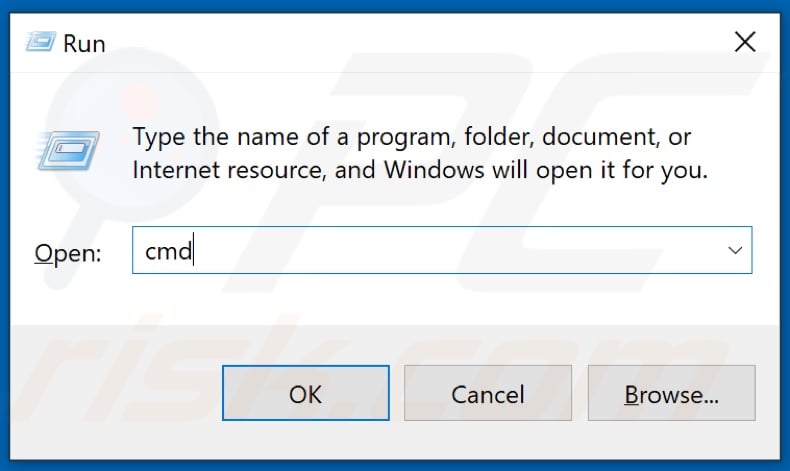
2. In the Run dialog box, type in CMD and hold down Shift+Ctrl+Enter keys to open up the elevated Command Prompt.
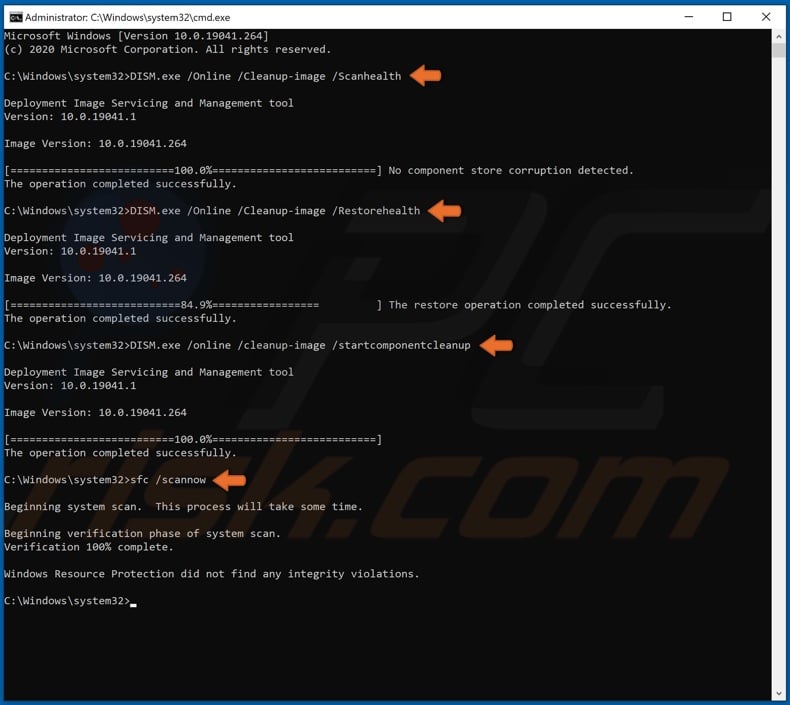
three. In the Command Prompt, enter the following commands.
• DISM.exe /Online /Cleanup-image /Scanhealth
• DISM.exe /Online /Cleanup-image /Restorehealth
• DISM.exe /online /cleanup-image /startcomponentcleanup
• SFC /ScanNow
4. Restart your PC.
[Back to Tabular array of Contents]
Method two. Disable Controlled Folder Admission
If you're struggling with the read-merely bug, the first and easiest affair to do is disable Controlled binder access. Nonetheless, we want to stress that disabling it might not be enough, so we recommend using this method forth with other methods found below.
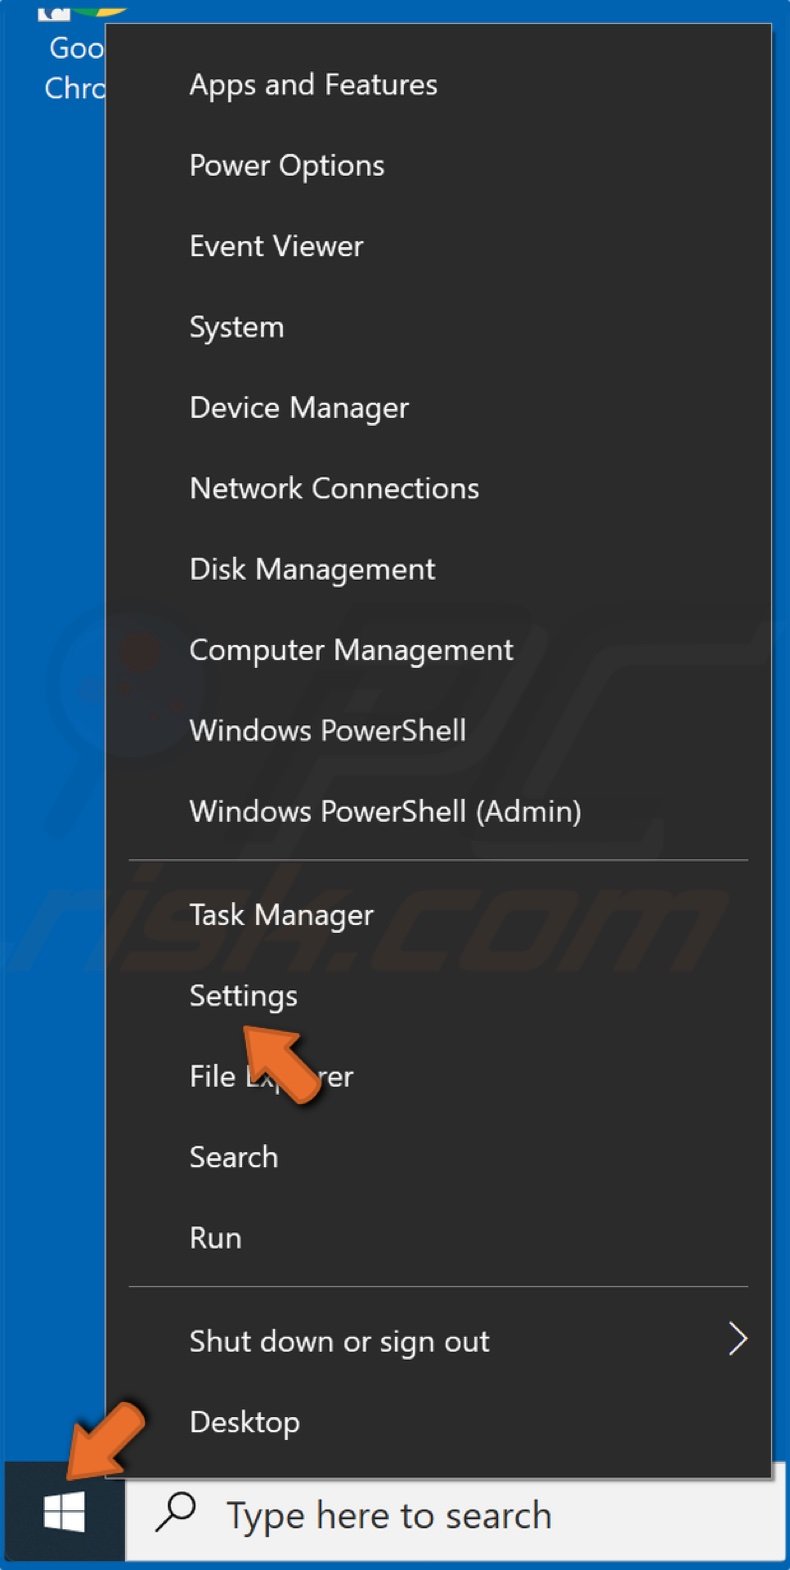
i. Right-click the Get-go Menu button and select Settings.
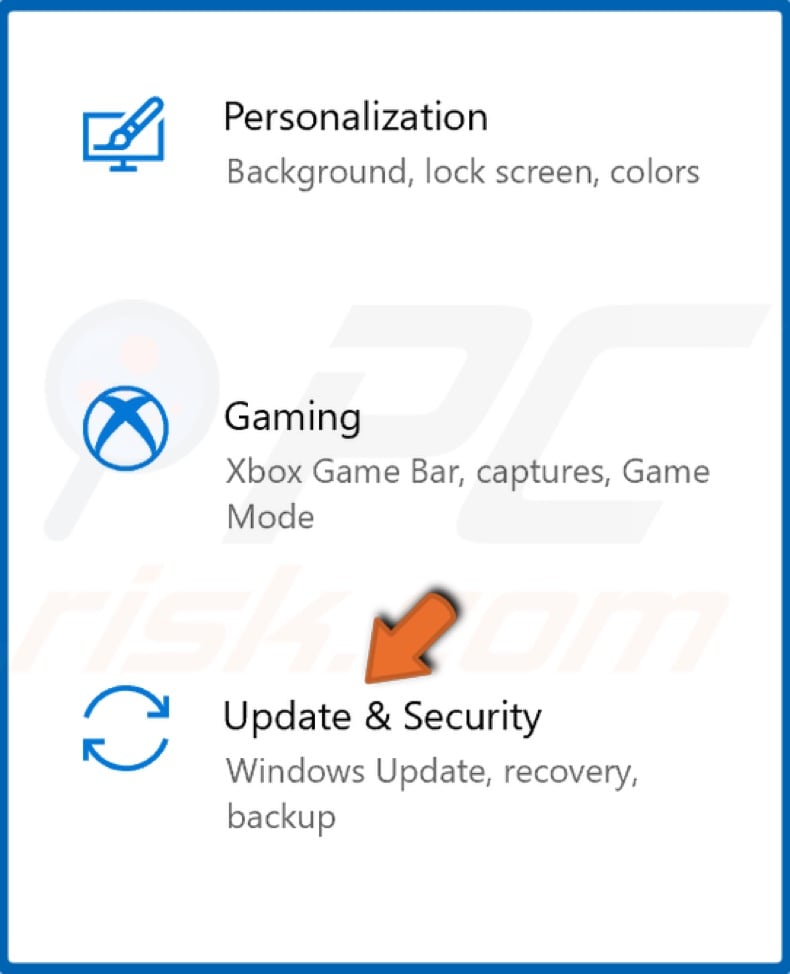
2. In one case in the Settings window, select Update & Security.
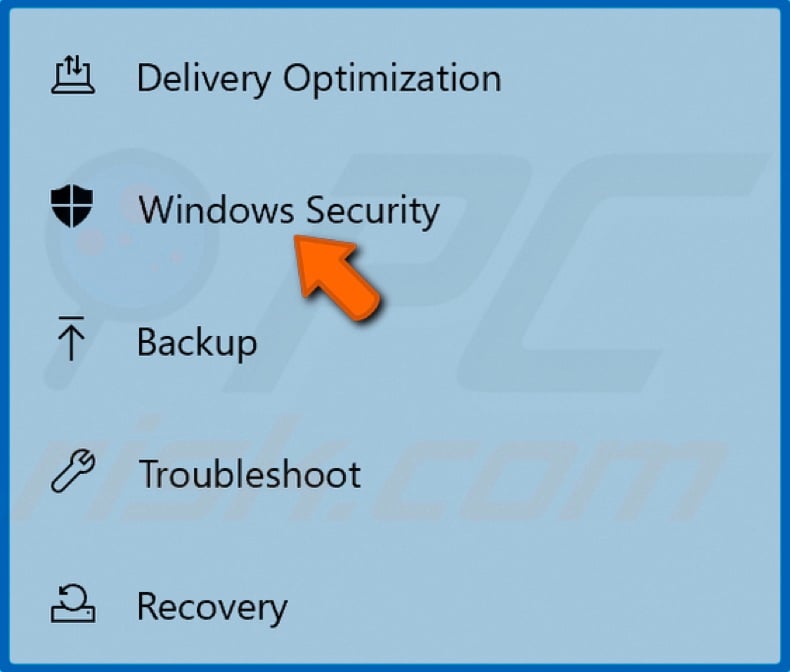
3. On the left pane, select Windows Security.
iv. And then, click Virus & threat protection.

v. Click Manage settings.
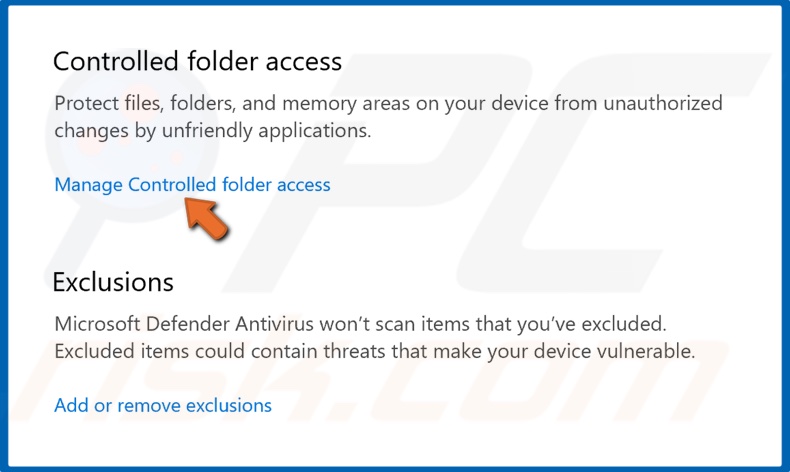
6. Nether Controlled folder access, click Manage Controlled folder access.
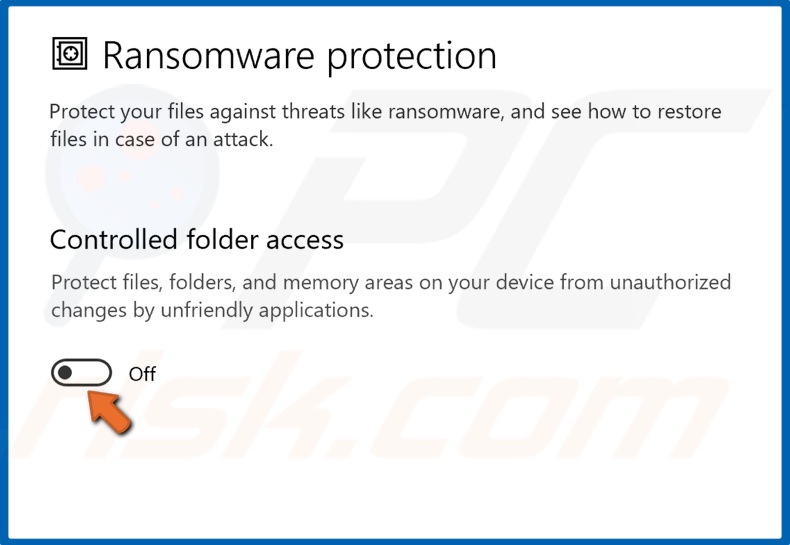
7. Toggle the slider off to disable Controlled folder access.
viii. Restart your PC.
[Back to Tabular array of Contents]
Method 3. Alter the Attribute of the Binder
If you're logged in as an administrator simply still can't edit or modify the files, and so yous tin endeavor changing the attribute of the problematic file using the Command prompt. The solution is to change the file attribute to Organisation using the Attrib command in the Command prompt. To do that, follow the steps below.
1. Simultaneously hold down Windows+R keys to open Run.
2. In the Run dialog box, type in CMD and concord down Shift+Ctrl+Enter keys to open the elevated Command prompt.
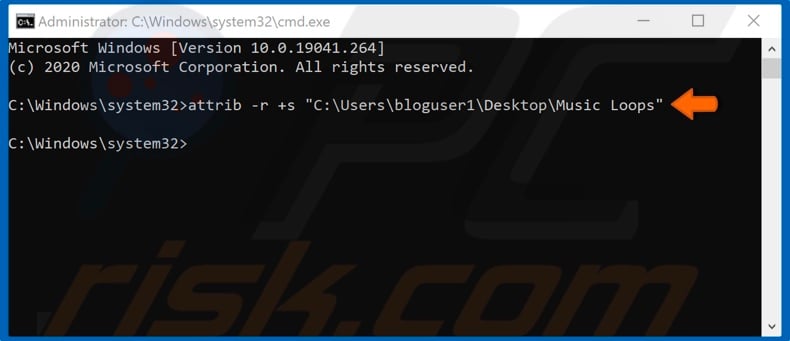
3. In the Command prompt, type in attrib -r +south "drive:\{path}\{foldername}" (indicating the right drive, full path, and binder name), and hit the Enter cardinal.

Running this control volition remove the read-simply attribute of the file, changing information technology to a system aspect. Nevertheless, be warned that some files and folders may not piece of work properly in the system attribute.
4. To remove the system attribute, type in attrib -r -s "drive:\{path}\{foldername}" in the control prompt and hit the Enter key.
[Back to Table of Contents]
Method 4. Modify the Permissions of the Bulldoze
If the read-only problems started to occur after updating Windows, you should endeavour changing the permissions of the Drive. Getting the appropriate permissions for your computer'southward Drive may fix the event. Here is how you tin can change the permissions:
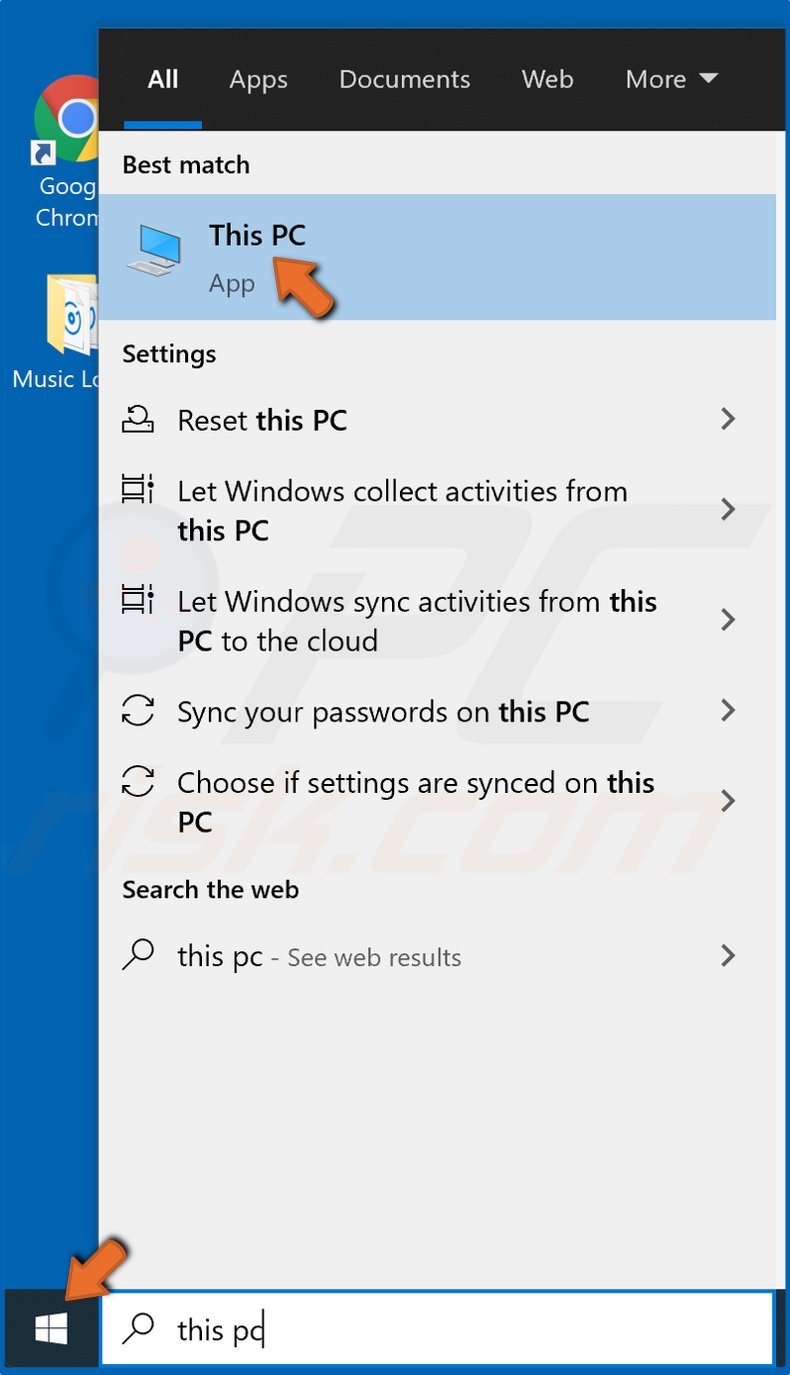
1. Open the Starting time Menu, type in This PC, and click the result.
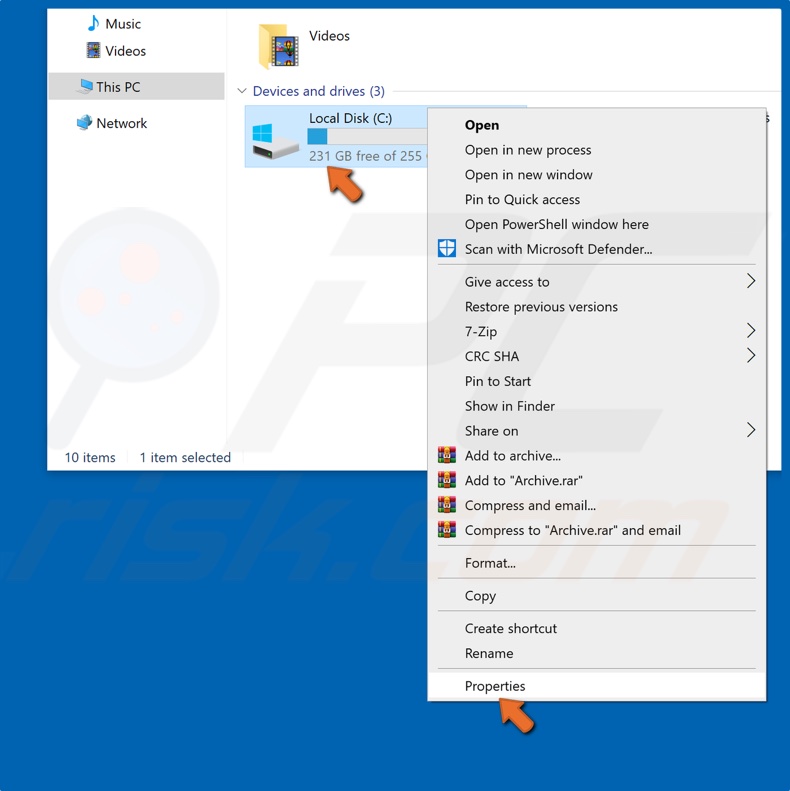
2. Right-click the Drive where the files/folders afflicted past the read-only problems are located and click Properties.
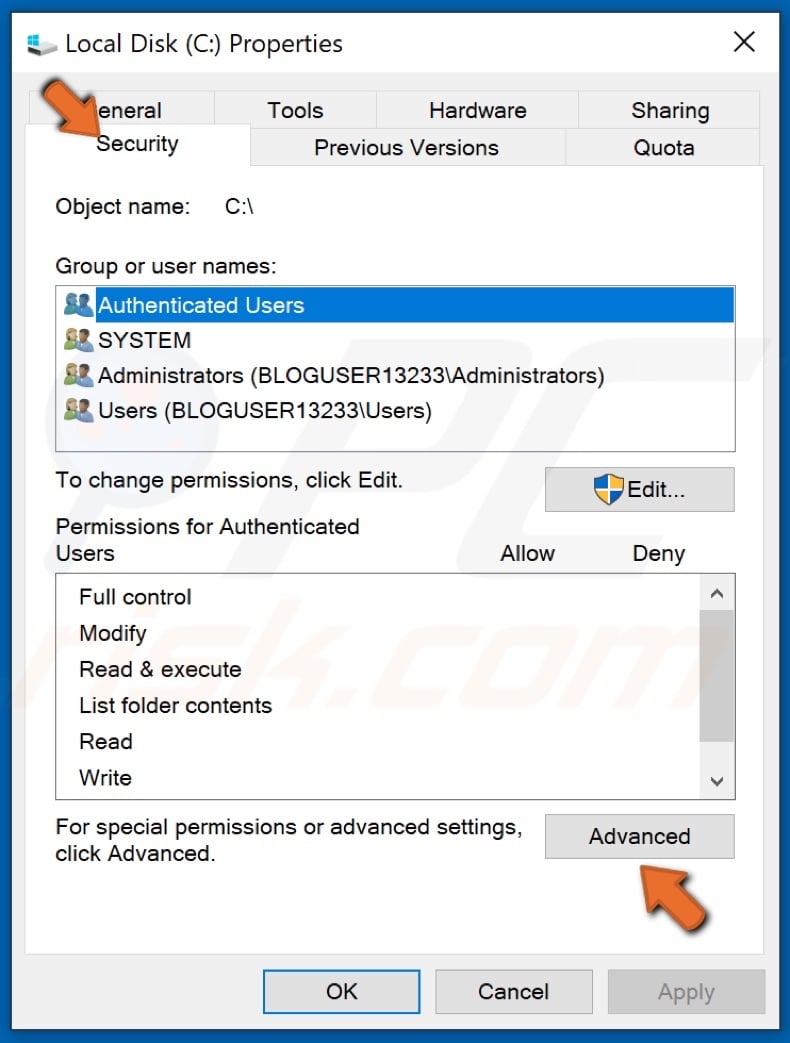
iii. Select the Security tab and click Avant-garde.
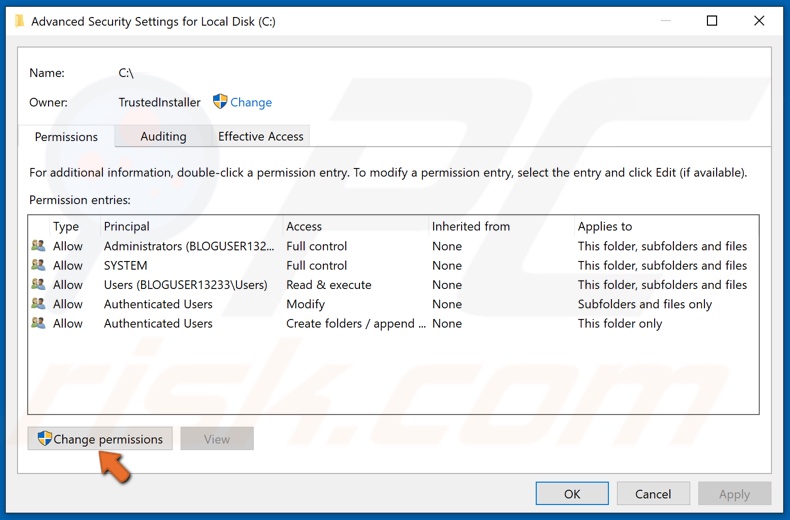
4. In the Advanced Security Settings window, select Change permissions.
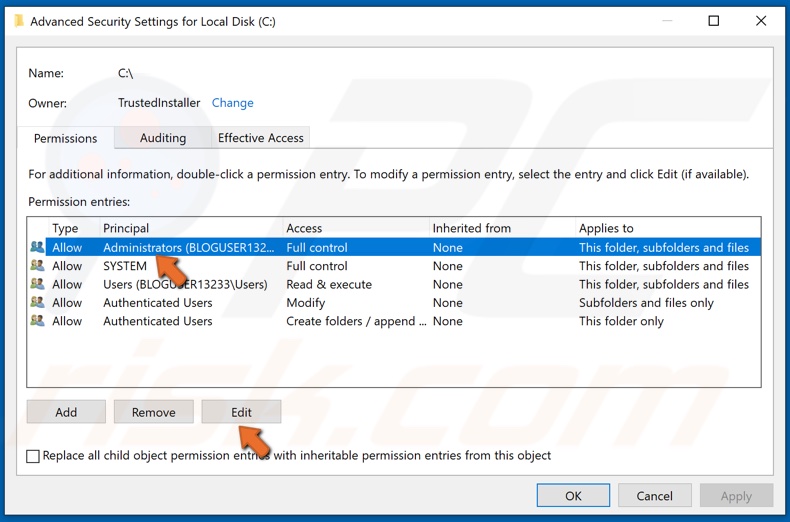
5. Select your user and click Edit.
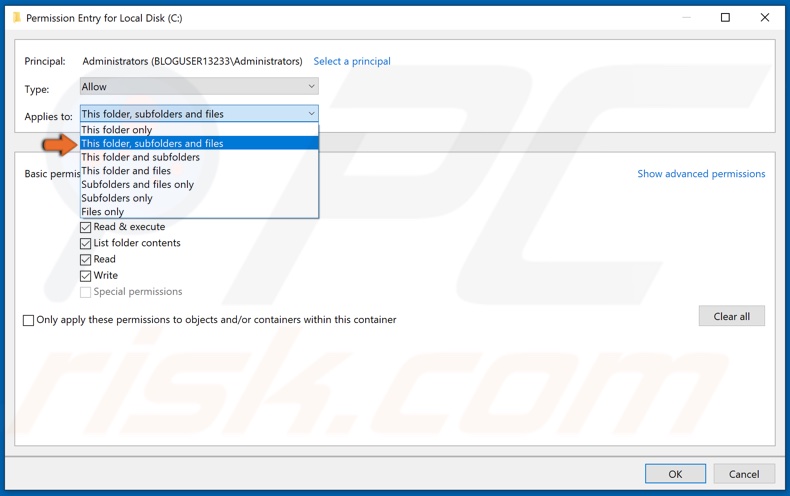
six. From the drop-downwards listing, click This binder, subfolders and files.
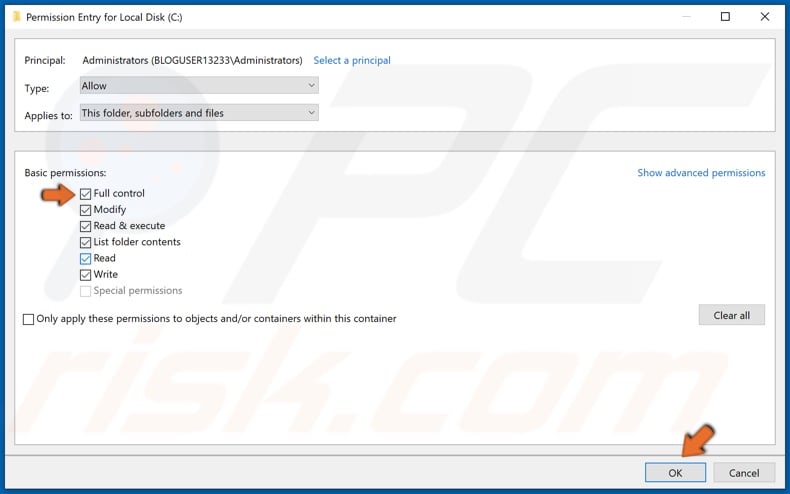
7. Nether the Basic Permissions section, tick the Full Control checkbox.
8. Click OK to salvage the new settings.
[Back to Top]
About the author:

Rimvydas is a researcher with over four years of feel in the cybersecurity industry. He attended Kaunas University of Technology and graduated with a Master's degree in Translation and Localization of Technical texts. His interests in computers and technology led him to become a versatile writer in the It industry. At PCrisk, he's responsible for writing in-depth how-to articles for Microsoft Windows. Contact Rimvydas Iliavicius.
Our guides are complimentary. All the same, if you want to support us you can send us a donation.
Source: https://blog.pcrisk.com/windows/13392-how-to-fix-folders-reverting-to-read-only-on-windows-10
Posted by: kinneytryin1978.blogspot.com
0 Response to "How To Change Read Only Folder In Windows 10"
Post a Comment