

How To Install Rabbitmq On Windows 10
Hither we will learn how to setup or install Erlang and RabbitMQ on windows machines and how to enable RabbitMQ web management plugin in step by step manner.
The RabbitMQ is built on Erlang runtime environment so earlier we install RabbitMQ, get-go we need to download and install Erlang in our machines.
What is Erlang?
Erlang is a full general-purpose programming language and runtime environment.
Erlang has built-in support for concurrency, distribution and mistake tolerance. Erlang is used in several large telecommunication systems from Ericsson.
Erlang Installation
Following is the link to download and install Erlang on your windows auto.
http://www.erlang.org/downloads
One time you open above URL, select a required version to download and install on your machines like every bit shown following.

After downloading the required Erlang version, at present we will install Erlang for that double click on downloaded install file and follow the instructions similar as shown below.

RabbitMQ Installation
After completion of Erlang installation, now we volition install RabbitMQ on windows for that download a RabbitMQ setup file from following link for windows.
https://www.rabbitmq.com/download.html
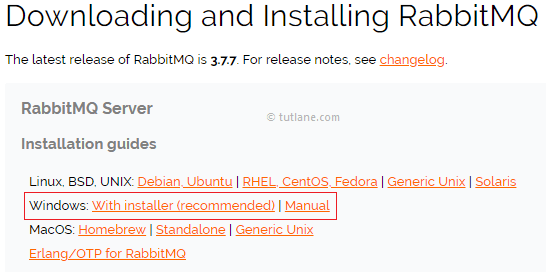
After opening the above URL, we will get a RabbitMQ setup files information like as shown below. Here we are going to install a RabbitMQ server on windows machine so nosotros will download the windows version similar as shown below.
After downloading the required setup file, just double click on setup file to install rabbitmq on windows similar as shown below.

Starting RabbitMQ Server
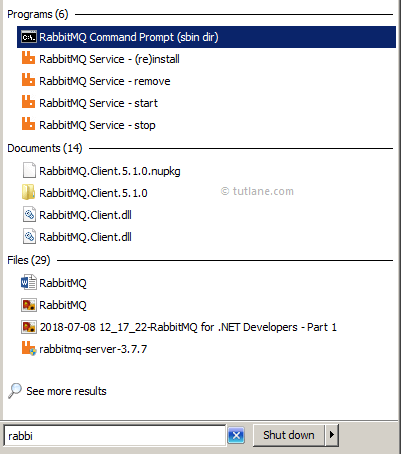
Afterward completion of installing the RabbitMQ server, we will check the condition of RabbitMQ server for that search for RabbitMQ Command Prompt and open up it with admin privilege similar as shown below.
Afterwards opening the command prompt, enter command "rabbitmqctl status" and click enter to cheque the condition of RabbitMQ server.
In case, if information technology shows an error like every bit beneath, and then y'all need to follow the given steps to fix this error.
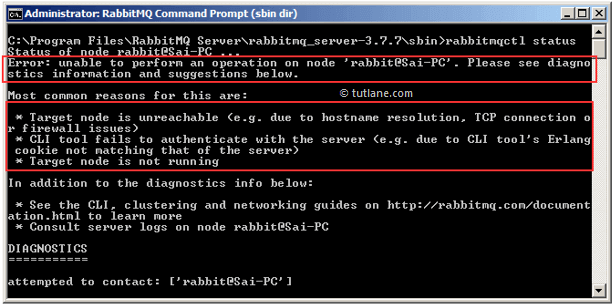
RabbitMQ Authentication Failed Error
Post-obit are the steps to fix an mistake like "Authentication failed (rejected by the remote node), check the Erlang cookie".
- In file explorer navigate to your user directory by pasting %userprofile% in your address bar.
- In instance if already .erlang.cookie file available in that location, merely delete it otherwise go to the adjacent footstep.
- In a second File Explorer, navigate to C:\Windows\System32\config\systemprofile.
- Find the file .erlang.cookie and copy it to your user directory.
- Now your rabbitmqctl should exist able to authenticate.
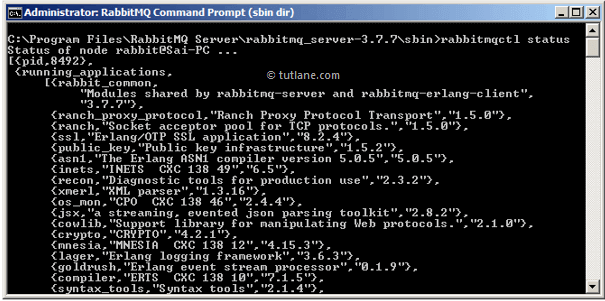
Later on completion of above steps, and then once again run "rabbitmqctl condition" command in rabbitmq control prompt as an administrator, then it will shows the screen like as shown below.
Now, we are washed with starting the RabbitMQ server, next we will enable a spider web management plugin for RabbitMQ.
RabbitMQ Enable Spider web Management Plugin
To enable a rabbitmq web direction plugin on windows, nosotros demand to start RabbitMQ Command Prompt with administrator privilege, enter the control "rabbitmq-plugins enable rabbitmq_management" and execute it.
After executing the above web management command, the spider web management plugins will be enabled and it volition show the plugins listing which are enabled.

Now you can open web management plugin in the browser for that enter the post-obit URL in browser and click enter.
http://localhost:15672
After opening the localhost URL in browser, it volition enquire yous for credentials to access spider web management plugin.
To admission rabbitmq web management dashboard, the default Username and password of is "guest" (Username: "guest" | Password: "invitee").

After login with default credentials, the following overview screen will appear.
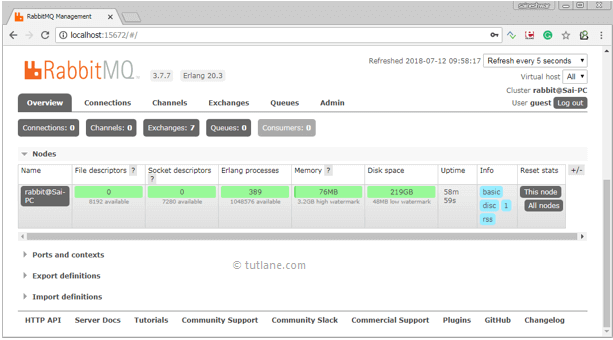
Now we have successfully started the RabbitMQ server and spider web management plugin.
In side by side capacity, nosotros will learn about the bachelor components of RabbitMQ such as Exchanges, Queues, Channels, etc with examples.
Source: https://www.tutlane.com/tutorial/rabbitmq/rabbitmq-installation
Posted by: kinneytryin1978.blogspot.com
0 Response to "How To Install Rabbitmq On Windows 10"
Post a Comment